Teaching Art is a feast into a of colour, line, texture, space and shape. By encouraging a visual exploration in my learning I love developing a creative approach to learning in the classroom. By encouraging different techniques and an understanding of art I hope to help students appreciate visual learning more. I hope you enjoy my uploads and can use them. Please contact me if you require any further information.
Teaching Art is a feast into a of colour, line, texture, space and shape. By encouraging a visual exploration in my learning I love developing a creative approach to learning in the classroom. By encouraging different techniques and an understanding of art I hope to help students appreciate visual learning more. I hope you enjoy my uploads and can use them. Please contact me if you require any further information.
A comprehensive drawing powerpoint with different tasks on developing drawing skills, discussions, mark-making exercises, different techniques, methods and examples to support observation skills in the classroom.
To use with GCSE and A-level students to develop their skills in looking at drawings and discussing their techniques but also doing a variety of different tasks to develop their own recording skills.
Learning to work with continuous lines, blind drawing, structural drawings, shading techniques, gestural drawing and free mark-making.
The powerpoint has examples of drawings of a number of artists like, Paul Seurat, Frank Auerbach, Rembrandt and Van Gogh and gives a number of opportunities to learn from these artists and gives different methods to use to strengthen one’s drawing skills.
This is a GCSE coursework project on a theme called ‘Surfaces’ giving you loads of ideas to develop with your students. It deals with developing ideas to gain confidence with different media and to develop sketchbook skills. It is about the process of developing the Examboard Assessment Objectives AO1- Develop ideas from artists and AO2 Exploring different media for coursework.
It gives a set of observational photographs to work from for Assessment Objective 3 - AO3.
It gives you different artists to look at to gather resources on and students will be able to use these as artist studies and begin to explore these artists techniques and do studies in their book. This if for Assessment Objective 1 and students can gain ideas on ways to develop their skills in techniques through these artists and in so doing ‘Develop ideas’.
There are further sets of techniques for Assessment Objective 2 and one can explore, experiment with ideas for developing ‘creativity’ in your classroom. That is, exploring a number of different media and showing how one can take risks with the media in order to create an interesting effect. There are slides giving you a set of techniques to use - explaining how to use media in creative ways. These techiques link with the list of artists given on slides to start with.
The experimental techniques are:
=white paint printing,
=wax and scratch,
=distressing surfaces,
=dripping paint, scraping paint,
=using sgrafitto,
=cardboard collaging
=layering digital manipulations with collage
=using fabric and sewing into surfaces.
Emphasis here is that students should play and take risks and experiment with different materials and begin to layer and be able to draw on different surfaces.
It is a fun set of techniques at GCSE and/or A-level with students using their own resource material and developing their confidence and fluency with making creative experiments. Students can develop their own responses using the techniques.
There are questions so that students can write a final evaluation.
After this set of work students should be confident and independent enough to find their own photographs and to develop their own idea for a final piece for Assessment Objective 4.
This is a powerpoint which gives tasks to interpret the style of Hundertwasser.
There are worksheets and information on the artist.
This is part of a project where students design a tile shape in colour using a building phito as an inspiration and stylise this into their own design.
Students then turn this into a clay tile outcome.
Students are to develop creative drawing by analyzing and interpreting a variety of selected artists.
Students will produce a drawing showing contextual evidence that supports the assessment criteria for the A Level course.
This powerpoint gives the LESSON PLAN AT TH END OF THE PRESENTATION.
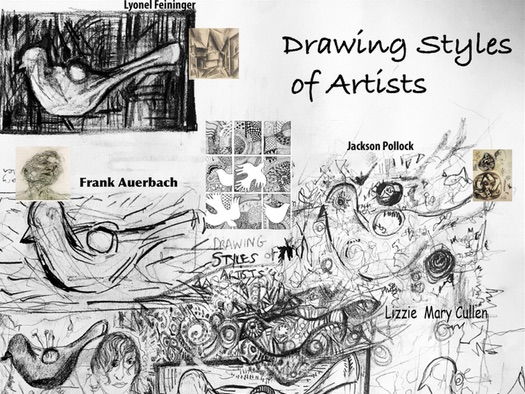
Students to reflect on examples of copies of drawings of different MASTERS and illustrators and begin to analyse the types of shapes, lines and marks.
Develop an understanding of signature styles of particular artists and the way the artist’s signature captures the intrinsic meaning of the artist.
Students to develop an A2 sheet of drawings which shows the different mark making skills of a number of different artists; develop a still-life drawing which support a number of different artists marks.
You must show evidence of research and of investigating and developing ideas. This should include visual work and, if appropriate, annotations or written work. Practical responses to the work of other artists, designers, craftspeople and photographers must show development in a personal way.
ASSESSMENT OBJECTIVE:
develop ideas through sustained and focused investigations informed by contextual and other sources, demonstrating analytical and critical understanding
Analysis Activity- follow Mark-making analysis of artists
Put students into PAIRS give out an example of each of these artists drawing – photocopy to pair
CULLEN AND AUERBACH,
VAN GOGH AND POLLOCK
FEININGER AND GILMAN
NICOLSON AND MICHELANGELO
Students to describe the marks, the quality of the lines and shapes that define the artist.
Analysis Activity Feedback– Choose one of the works and will one of you in the group discuss this with the class. Other students may also add comments.
TASK ACTIVITY Creative Practical Skills independently
Students to choose 2 of the artists discussed or analysed in the groups and try to do a drawing now in the style of those two artists.
With a ‘window frame’ students to draw in the style of the artist in a small frame on their sheet.
Prompts Questions to Evaluate Drawing outcome
What does it remind you of?
What does the work represent?
Have any parts been exaggerated or distorted?
What message does the work communicate?
What kind of marks does the artist use?
What kind of shapes can you find?
What materials and tools have been used?
How does the work make you feel? Does the line, shape, colour affect your mood?
What do you like about it Why? What don’t you like? Why?
How might you take ideas to use in your own work?
What do you know about the artist?
Does the work relate to the social or political history of the time?
The powerpoint first of all gives you some techniques to use with paper and students to make a sample board of the techniques.
Homework task: Zentangle …see powerpoint example
Students then go on to draw out an insect and there are symmetry templates for you to use to develop insects.
There are also lots of different resources and pictures of insects to use.
Further task is then to build the paper craft techniques on the pen drawing and to make your relief paper insect. There are examples of different paper techniques and samples to develop.
**Learning Objectives **
Using the topic given insects/birds the aim is to develop their paper art skills and to begin to make an insect. Also, to use skill of symmetry and practise drawing skills and to build a 2D relief insect using paper creatively.
• To learn how to do various paper art techniques and develop ability to manipulate paper.
• To explore a number of different paper craft activities, there are slide examples of techniques.
coiling paper
folding paper
spiraling paper
layering paper
scoring paper
embossing paper
twisting paper
rolling paper
curling paper.
• To EXPLAIN HOW TO carefully draw out insects using the symmetry insects as a guideline.
• To cut out the shapes of insect drawing carefully
• To explore paper techniques.
**Resources **
Large square of re-cycled paper to paste the paper sample techniques on
Glue – pritt stick and pots of glue
Pencils, Scissors
Magazine paper to use to make insects, Pens to draw with
Tracing paper to help with symmetry drawing
**ACTIVITY OBJECTIVES **
To make a sample board of different effects one can achieve when using paper as an art form.
To develop a range of skills to use when working with paper artists and craftsman
To learn to coil, scratch, spiral, fold, bend, cut and lift, twist, emboss, layer, cut, roll and manipulate paper
To learn about different paper artists and craftsmen who work with paper as an art form.
To learn to use paper and to craft various shapes and folds
To learn to build a paper insect using the paper craft techniques, that is, to fold, score, layer, cut, emboss and coil a paper insect
To do homework task: Zentangle insect.
Examples of artists on the Powerpoint to help you to build a 3D paper sculpture with techniques
Also various templates to help you to draw an insect - especially to develop your ability to use symmetry.
The powerpoint consists of the following:
Students will learn about Wassily Kandinsky and his abstract Art and be able to make their own version of Kandinsky while listening to four pieces of music.
Task 1: Describing artwork tasks (slide2)
Task 2: Answer questions on Kandinsky (slide 3)
Task 3: Listening to music and interpreting this (slide 4)
Divide your paper into 4 blocks as seen in the example and in your blocks you need to draw what you interpret while listening to the four pieces of music.
Listen to the You Tube tracks of music - one at a time. While listening to the music in each block while you listen to the music you need to draw what the music makes you feel. (Copy the http address into search to hear music)
That is, you need to Interpret the music by drawing shapes, colours, textures, lines, forms, images and what you feel the music represents.
A scheme of work starting with a pencil drawing, then a monoprint and the students interpret this in different artist styles.
Asian -British artist, Chila Burman and Frida Kahlo with a variety of different portrait artists to look at.
They use the monoprint and combine this with a Pop art collage
The students then take a photograph and then do a cultural drawing in felt tips interpreting this using cultural patterns.
I have also added a few other portrait powerpoints to use in the project.
A sculptural project or life drawing project inspired by the famous British artist, the drawings of Henri Moore.
Looking at the ink wash drawings of Henry Moore in detail his presentation shows loads of examples of the way he sketched his body shapes and looks at the way he simplified the bodies into organic shapes.
This is a good presentation to show KS3 how to simplify and to distort drawings of different poses into organic shapes. This can be used for KS3 making abstract body sculptures and shows how to reduce, simplify, re-arrange and to distort drawings into a pleasing harmonious shape.
It can also be used for A-level students doing life drawing and giving ways to explore different wax resist techniques with ink washes.
There are loads of pictures of Henri Moore’s Drawings and hopefully will inspire outcomes and enable students to develop some confidence when drawing figures.
This presentation can be bought with the Life drawing presentation.
This is lesson 4 in the portrait project.
Students firstly do a pencil shading of their face using the grid technique and learn how to draw different parts of the face carefully.
Secondly students do a monoprint and this is in lesson 2 portrait project and they use their photograph to trace off into the ink to make the monopring.
Thirdly students then collage into the monoprint and use Paolozzi as an artist and collage into the monoprint.
In this powerpoint the student use one of their photographs and draw into the photocopy. Students look at the artist Chila Burman and look at the way she interprets her Asian and British identity. Students need to think about their own identity and the way they are going to collage into their own photo-copy.
Students use felt tips and draw into the photocopies making patterns and try to interpret cultural patterns in bright colours.
Your Learning Objective was:
To study an example of CHILA BURMAN n your book and describe what you see
Students to find out about CHILA BURMAN and begin to understand her Asian and British identity.
Students to use their photograph and develop the bright colours and cultural identity in the portrait.
To use cultural patterns and to create a self identity photo portrait.
SUCCESS CRITERIA
Cultural awareness of our differences
Understanding of different styles and using digital photography creatively with patterns
Appreciation of own patterns and self-identity
Collaging: Photographs of everyday items, patterns, favourite clothes, magazine text, Newspaper highlights, paint textures and close up of photos of household items: objects that show own culture and self-identity
These are a set of 6 sheets which can be laminated for classroom tables to help students with writing about Art.
These are lists of descriptive words linked to the Elements of art and the Principles of design. These will help students to be able to write about artworks and help to broaden vocabulary.
There are also words to help with writing at GCSE and support with writing under the GCSE Assessment Objectives as well.
There are also sheets to help with writing frames to support weaker students when they analyse and write about their artworks.
This can be used with Key Stage 3, GCSE and A-level
Leaving these on the desks in the classroom support literacy learning and help students with vocabulary.
A history of art powerpoint showing key sculptural examples from the early Paleolithic sculpture to the work of Michelangelo showing all the key developments in form to show more realism.
There are lots of notes to provoke discussion in the class on the different sculptures.
Various comparative tasks can be given to develop students ability to analyse the sculptural forms.
This also tells the story of art and the development of sculptural form in Art and how art develops through the ages from Paleleolithic, Egyptian, Greek - Archaic, Classical, Hellenistic Art and Gothic Art following with Early Renaissance and the work of Donatello to the work of Michelangelo in Late Renaissance.
Students learn about key sculptures to develop their knowledge of art and begin to understand how sculptural form developed.
There is a beginning of understanding how the first sculpture was a small fertility form - the Venus of Willendorf and how this was used to empower people and how this then develops to capture the emotion and pathos in the work of Mary Magdalene by Donatello.
Many comparisons can be drawn and it enables students to see the development of form and so understand the history of art.
The project has examples of plant forms to look at and by using Ernst Haeckel and Nikki de St Phalle. The students begin to research their own design plant shape on a presentation sheet. This involves drawing with fine pens over a wash of colour.Examples are given in Powerpoint - lots of pictures of plants and examples of how to do a wash.
Students can also do some Wax and scratch drawings of natural forms using wax crayons and oil pastels. Students then present these on a preparatory sheet- there are examples of this technique.
Secondly students then using their own drawings (wax and scratch) of plants and Niki de St Phalle and Haeckel begin to do a design sheet for their monster plant.
Resources needed: Plastic pot plants to stand the branches and plants in, withies, newspaper, tissue paper, masking tape, PVA glue to make paper mache glue, re-cycled card, re-cycled bottles, acrylic paints to decorate.
The students study they work of Niki De St. Phalle looking at her biomorphic and colourful sculptures and then by using the her work as inspiration plan a design and build a 3D form using withies, found re-cycled plastic bottles and cardboard and construct a plant form in a large plastic plant pot as a basis. There are examples of outcomes and examples of skills to use in the buildong of construction,
The powerpoint has lots of examples to use as inspiration and final examples of outcome.
Students given examplesof nature pictures and to create a repeat pattern from a pencil drawing of these pictures Pictures of nature for students to draw from and then how to make a repeat unit from this drawing
Showing how to make a mirror repeat, half-drop repeat, straight repeat and diagonal repeat.
Resources needed: Tracing paper, pencils, calico fabric cut in squares, ink rollers, waterproof inks,
Step by step breakdown of design and printing processes
Guidelines on how to use polyprint. Students make a repeat pattern on fabric and then sew this into a cushion
There are lots of student examples to support
Examples of student work
Success Criteria
Simplifying drawing into a line pattern and making a repeat unit,
Choosing a colour combination for repeat unit and drawing out the unit on fabric
Carefully rolling out the colours and layering the print from light to dark.
Strong contrasts of colour
Careful accurate layering of colours.
A powerpoint outlining some tasks for a Key Stage 3 project on Tim Burton. In this project there are a number of skills, pencil drawingwith pen work, chalk and charcoal drawing on black paper, making a black and white silhouette cut out, collaging harcoal drawing onto bottle and painting bottle, further developing a character on a bottle and making a wool paper character. This also has a few quizzes and student examples of work to support the tasks.
Starting with presenting a title page for Tim Burton and copying some of his scenes by practising pencil tone and mark making. Layering pencil and black pen in drawing when copying Burton’s work Photocopy examples for students to work from to print off.
Then developing a cut out in black paper looking at the strange, Gothic type black and white silhouettes of some of his scenes and making a page on his settings using black paper and cut-outs.
The slides give a number of the silhouette type scenes for students to use for inspiration. Further developing a character drawing and students are to look at the number of different slides and these could be printed off for students and letting them develop their own character. Some of the You tube film clips are linked on the slides as well. Students draw out the character and then colour this in.
Tim Burton’s scenes are often dark and atmospheric and this is an ideal opportunity to practise drawing with white chalk, charcoal or black soft pastel on black sugar paper and to do a drawing of one of his black and white characters. There are some examples to use to copy from to support the students learning. This black and white scene can further be photocopied and collaged onto a bottle. There is also an extension task to make a head on a wine bottle in paper-mache and lots of inspirational examples of student work
Another fun task is to play with wool and paper and to make a rolled animal using newspaper in rolls and then wrapping wool around this and to bend into shape. This can further be embellished by adding bits and bobs like buttons, braid and other decorative details to develop a character type animal which has been inspired by Burton.
There are a few quizzes and homework tasks as well.
A summary of objectives and the requirements for students to continue to do homework based on these. A few lists of homework ideas and a summary of what is required.
This is a good place to start to understand what is colour and colour theory in the form of organising colours in a colour wheel. This i normally do in year seven but also go through again at GCSE - students should learn a large number of colour terms through this powerpoint.
The powerpoint gives clear steps to making a colour wheel and then explains all the colour terms in depth, primary, secondary colour snd tertiary colours, with complementary and analogous colours.
There are also more colour study tasks and more colour terms to understand, so it goes into more depth on different colours- including degraded colour, triads, hue, chroma, tint, tone, luminosity, lustre, neutral colours, monochrome and split contrasts.
We will be learning to make a colour wheel
We will be learning about colour terms
We will be learning to make a colour wheel with paint, or with pencil crayons or with found objects
We will be learning to combine a range of objects and arrange them in a colour wheel
We will be making a drawing developing a mood by using colour
There are also video clips on colour studies linked to tasks.
Based on an understanding of colour there is a task to represent their own memories and feelings using colour, shape and pattern. “Try to close their eyes and remember an experience in terms of colour and form. Try to make visual notes in your sketchbooks. Make a painting which symbolises the experience let your feelings and memories come out by using different colours, shapes and patterns.’”
This is a key stage 3 project where students do a polyprint on fabric using printing inks. This is a short 6 week project but could be developed to incorporate embellishments and sewing skills to fabric. I did this with year 8 and it took 6 weeks. Student enjoyed the outcome and it could have been made into a cushion for each student but we made a class fabric wall hanging. (There is a second Powerpoint in a Bundle which has all the pictures used for students to work from - A-Z of nature pictures)
Artists used: Angie Mitchell and Ernst Haeckel
Resources required
Polyprint blocks
Printing ink
Rollers
Tables to roll out on
Fabric square per child
Paper for test prints
Research sheet for drawings and artist research.
Project schedule 6 weeks
The resources for the students to work from. Each student chooses what they would like to draw.
The steps to take while making the print and examples of student’s outcome.
Students begin by researching Angie Mitchell and Ernst Haeckel and make up a sheet with these two artists and their drawings. The drawings they do of one of the pictures of the slide pictures of animals and bits of nature from A-Z. Students choose which animal or fish or plant they would like to draw. Students spend time doing a detailed drawing and design a border pattern for this work in black and white.
Success criteria of drawings
To use fine lines and to capture quality detail
To concentrate on negative and positive shapes
To develop a border pattern from nature around the drawing
To try to layer up your drawing with foreground and background shapes
The students drawings are then photo-copied and transferred to the polyprint block. Students use the photocopy to press through onto polyboard. The students are given a square and a strip of polyprintboard . Students first of all experiment printing on paper with their design and border. Students can do a black and white print or do a polyprint print of two colours overlaying their inks.
The slide presentation gives you also opportunities for reflection and evaluation of outcome at the end.
I have presented my artists in my book
I have compared the works of 2 nature artists
I have written a short paragraph on the style of artists
I have a careful line drawing of my subject
I have created my own artwork based on my research of subject colour
I have a plan for my print design and have written about relief printing
I have tested working with polyprints
Student outcome is a wall-hanging and we sewed all the students outcomes together to make a fabric collage of squares.
A project for KS3 possible Year 8 looking at Surrealism and the ‘psycho-automatism’ of the artists.
Students develop a FANTASY LANDSCAPE for their own paintings out of ink blobs dropped onto their paper and out of random scribbles.
Students learn to use these abstract shapes creatively in a composition and are able to thus learn how to shade with paint from light to dark to create a 3D effect of form. The emphasis is on getting students to understand what is chiaro=scuro through the light and dark modelling of abstract shapes. The abstract shapes help them understand that there is no wrong and helps them focus on getting the 3D modelling right.
The students need to make a wash for a background with watercolour - using perhaps a sponge. The emphasis is on creating a sense of space with a horizon line and students have to compose their blob/scribble shapes in this infinite space to create a sense of depth on a flat surface. Students need to repeat the shapes and arrange them in different sizes. Students also need to create a sense of interest in the painting.
Their surreal shapes are repeated and they are able to change the scale of their forms to develop their fantasy landscape.
The second task is to do a black and white pen drawing of their painting, this develops mark-making skills and patterning. This is also a technical exercise where students have to then transform their painting into a black and white pen rendering.
This powerpoint has examples of student’s work which helps to support the development of these activities.